June 23, 2026 · The MailTrigger Team
SPF, DKIM & DMARC for Cold Email: A Step-by-Step Setup Guide
If you send cold email in 2026 and you haven't set up SPF, DKIM, and DMARC, your mail is going to spam — full stop. Gmail and Yahoo now require all three for bulk senders, and Microsoft has started rejecting non-compliant mail outright. The good news: setup is a one-time job of publishing a few DNS records. This guide walks through each one in plain English, with the exact records, alignment rules, and the DMARC policy you actually need.
This is the authentication layer of the broader cold email deliverability playbook — get it right and everything else you do has a chance to work.
What each record does (in plain English)
Think of the three records as answering three questions a receiving mail server asks about your message:
- SPF (Sender Policy Framework) — "Is this server allowed to send mail for this domain?" You publish a list of authorized sending servers; the receiver checks the sender against it.
- DKIM (DomainKeys Identified Mail) — "Was this message actually signed by the domain, and untampered in transit?" Your sender signs each message with a private key; the receiver verifies it against a public key in your DNS.
- DMARC (Domain-based Message Authentication, Reporting & Conformance) — "If SPF or DKIM doesn't line up, what should I do with this message?" It ties SPF and DKIM together with an alignment check and tells receivers your policy.
Together they prove a message genuinely came from your domain. Miss one and providers can't fully trust you.
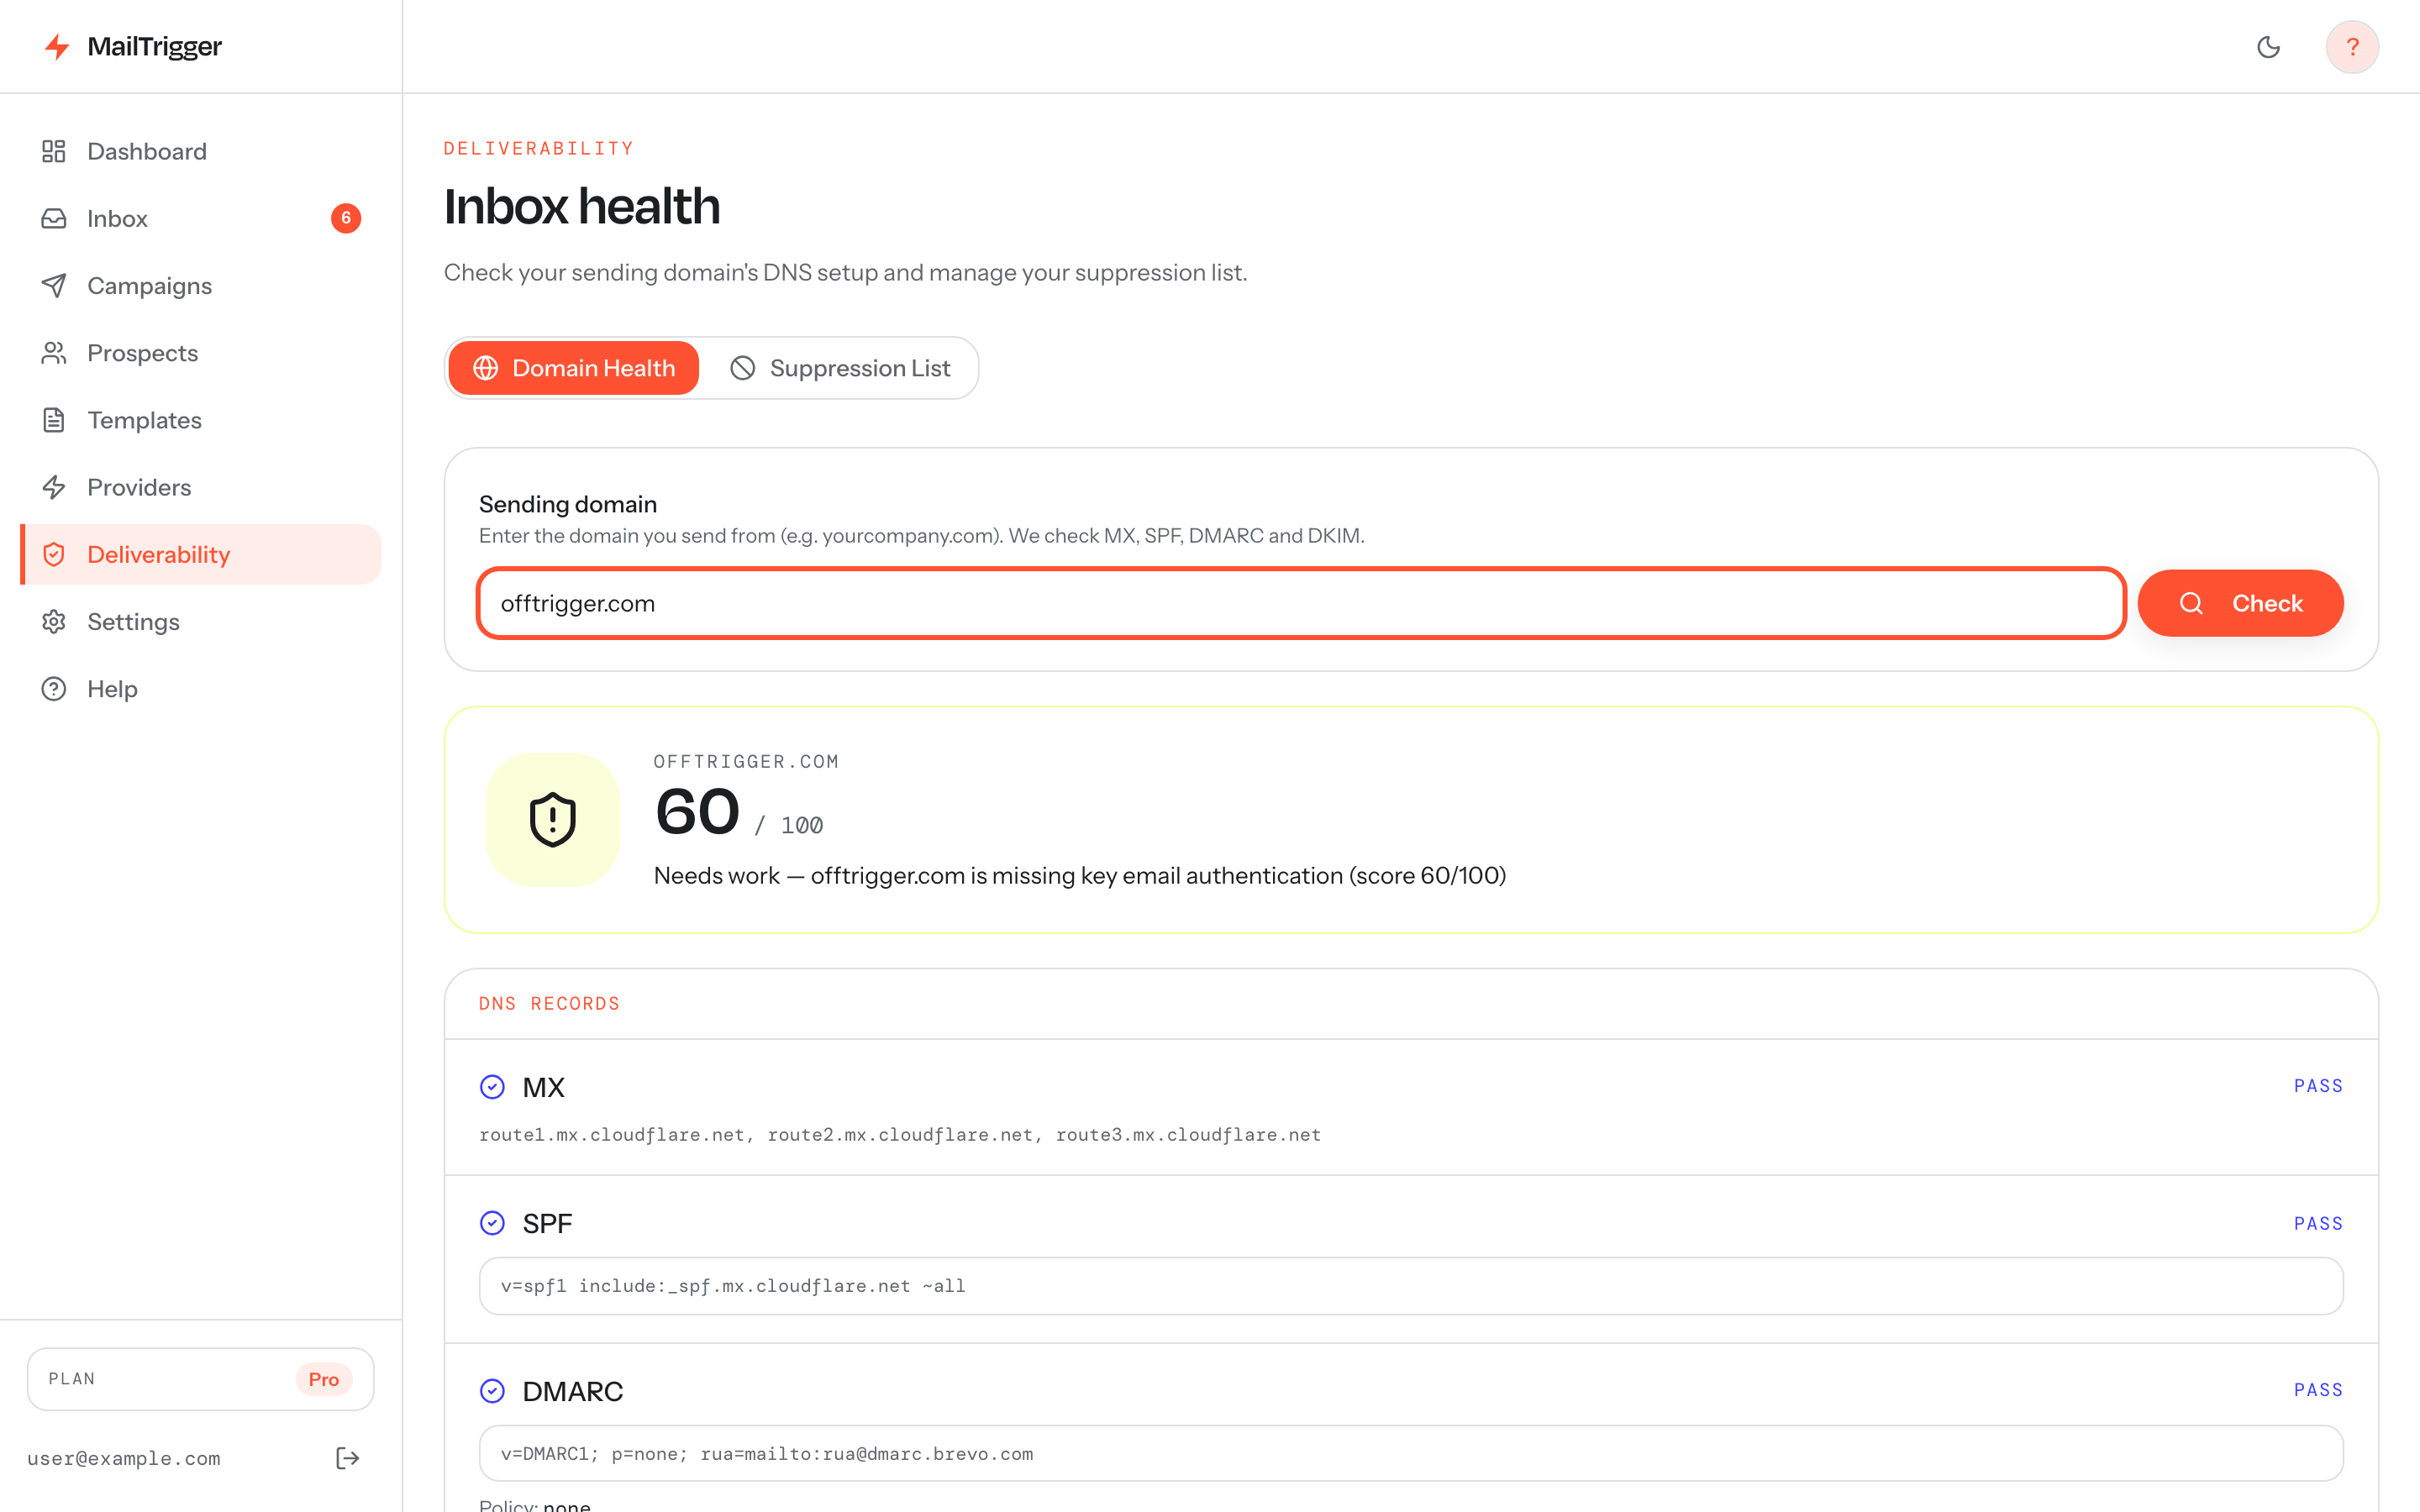
 The domain checker scores MX, SPF, DMARC and DKIM into a single sender-reputation health score — here SPF and DMARC pass but DKIM is missing, dragging the score to 60/100.
Why Gmail and Yahoo require all three
Since the 2024 bulk-sender rules, Gmail and Yahoo expect senders to authenticate with SPF, DKIM, and DMARC, and to have the From: domain align with at least one of SPF or DKIM (support.google.com; PowerDMARC). Microsoft joined in, rejecting non-compliant bulk mail to Outlook/Hotmail from May 5, 2025 (Security Boulevard). On top of authentication, providers also expect a valid PTR (reverse-DNS) record and a TLS connection for your sending mail server (support.google.com).
Step 1 — Set up SPF
SPF is a single TXT record published at your domain's root. It lists the servers and services allowed to send on your behalf. A typical record for a domain sending through Google Workspace plus one ESP looks like:
v=spf1 include:_spf.google.com include:spf.youresp.com -all
Key points:
v=spf1starts every SPF record.include:delegates to a provider's own SPF (your ESP gives you the exact value to include).-all(hard fail) tells receivers to reject anything not listed;~all(soft fail) is more lenient. Use-allonce you're confident every legitimate sender is included.- The 10-lookup limit. SPF allows a maximum of 10 DNS lookups when evaluating a record. Each
includeand certain mechanisms count toward it. Exceed 10 and your SPF returns apermerrorand effectively fails — so don't stack a dozenincludes.
Publish only one SPF record per domain. Multiple SPF TXT records is itself a failure.
Step 2 — Set up DKIM
DKIM signs each message with a private key and publishes the matching public key in DNS under a selector. The flow:
Generate the key in your sending platform. In Google Workspace, go to Apps → Google Workspace → Gmail → Authenticate email, and generate a DKIM key. Your ESP (Brevo, SendGrid, Resend, etc.) has an equivalent screen.
Publish the public key as a TXT (or CNAME) record at the selector host the platform gives you, e.g.:
google._domainkey.yourdomain.com TXT v=DKIM1; k=rsa; p=MIGfMA0GCSq...Here
googleis the selector — it lets you run multiple DKIM keys (one per sender) on the same domain without collision.Turn on signing in the platform once DNS has propagated.
Many ESPs hand you CNAME records that point at their DKIM keys — publish those exactly as given. After setup, send a test and confirm DKIM=pass in the message headers.
Step 3 — Set up DMARC
DMARC is a TXT record at _dmarc.yourdomain.com. The minimum record to satisfy the bulk requirement:
_dmarc.yourdomain.com TXT v=DMARC1; p=none; rua=mailto:dmarc@yourdomain.com
The p= tag is the policy — what receivers do with mail that fails the DMARC check:
| Policy | What it does | When to use |
|---|---|---|
p=none |
Monitor only — failing mail is still delivered, and you get reports. | Starting out. p=none is enough to satisfy the Gmail/Yahoo bulk requirement. |
p=quarantine |
Failing mail goes to spam. | Once your reports show legitimate mail consistently passing. |
p=reject |
Failing mail is rejected outright. | Mature setup, full confidence, maximum spoofing protection. |
You do not need p=quarantine or p=reject to comply — Gmail and Yahoo accept p=none as meeting the requirement (support.google.com; PowerDMARC). Start at p=none, watch the aggregate reports (rua), and tighten the policy only after you've confirmed nothing legitimate is failing.
Alignment: the part people miss
DMARC doesn't just check that SPF or DKIM passes — it checks they align with your From: domain. SPF alignment means the SPF-checked domain matches your From: domain; DKIM alignment means the DKIM-signing domain matches it. You only need one of the two to align for DMARC to pass (support.google.com). This is why sending "from" your own domain through an ESP requires you to authenticate your domain, not just rely on the ESP's.
Verify before you send
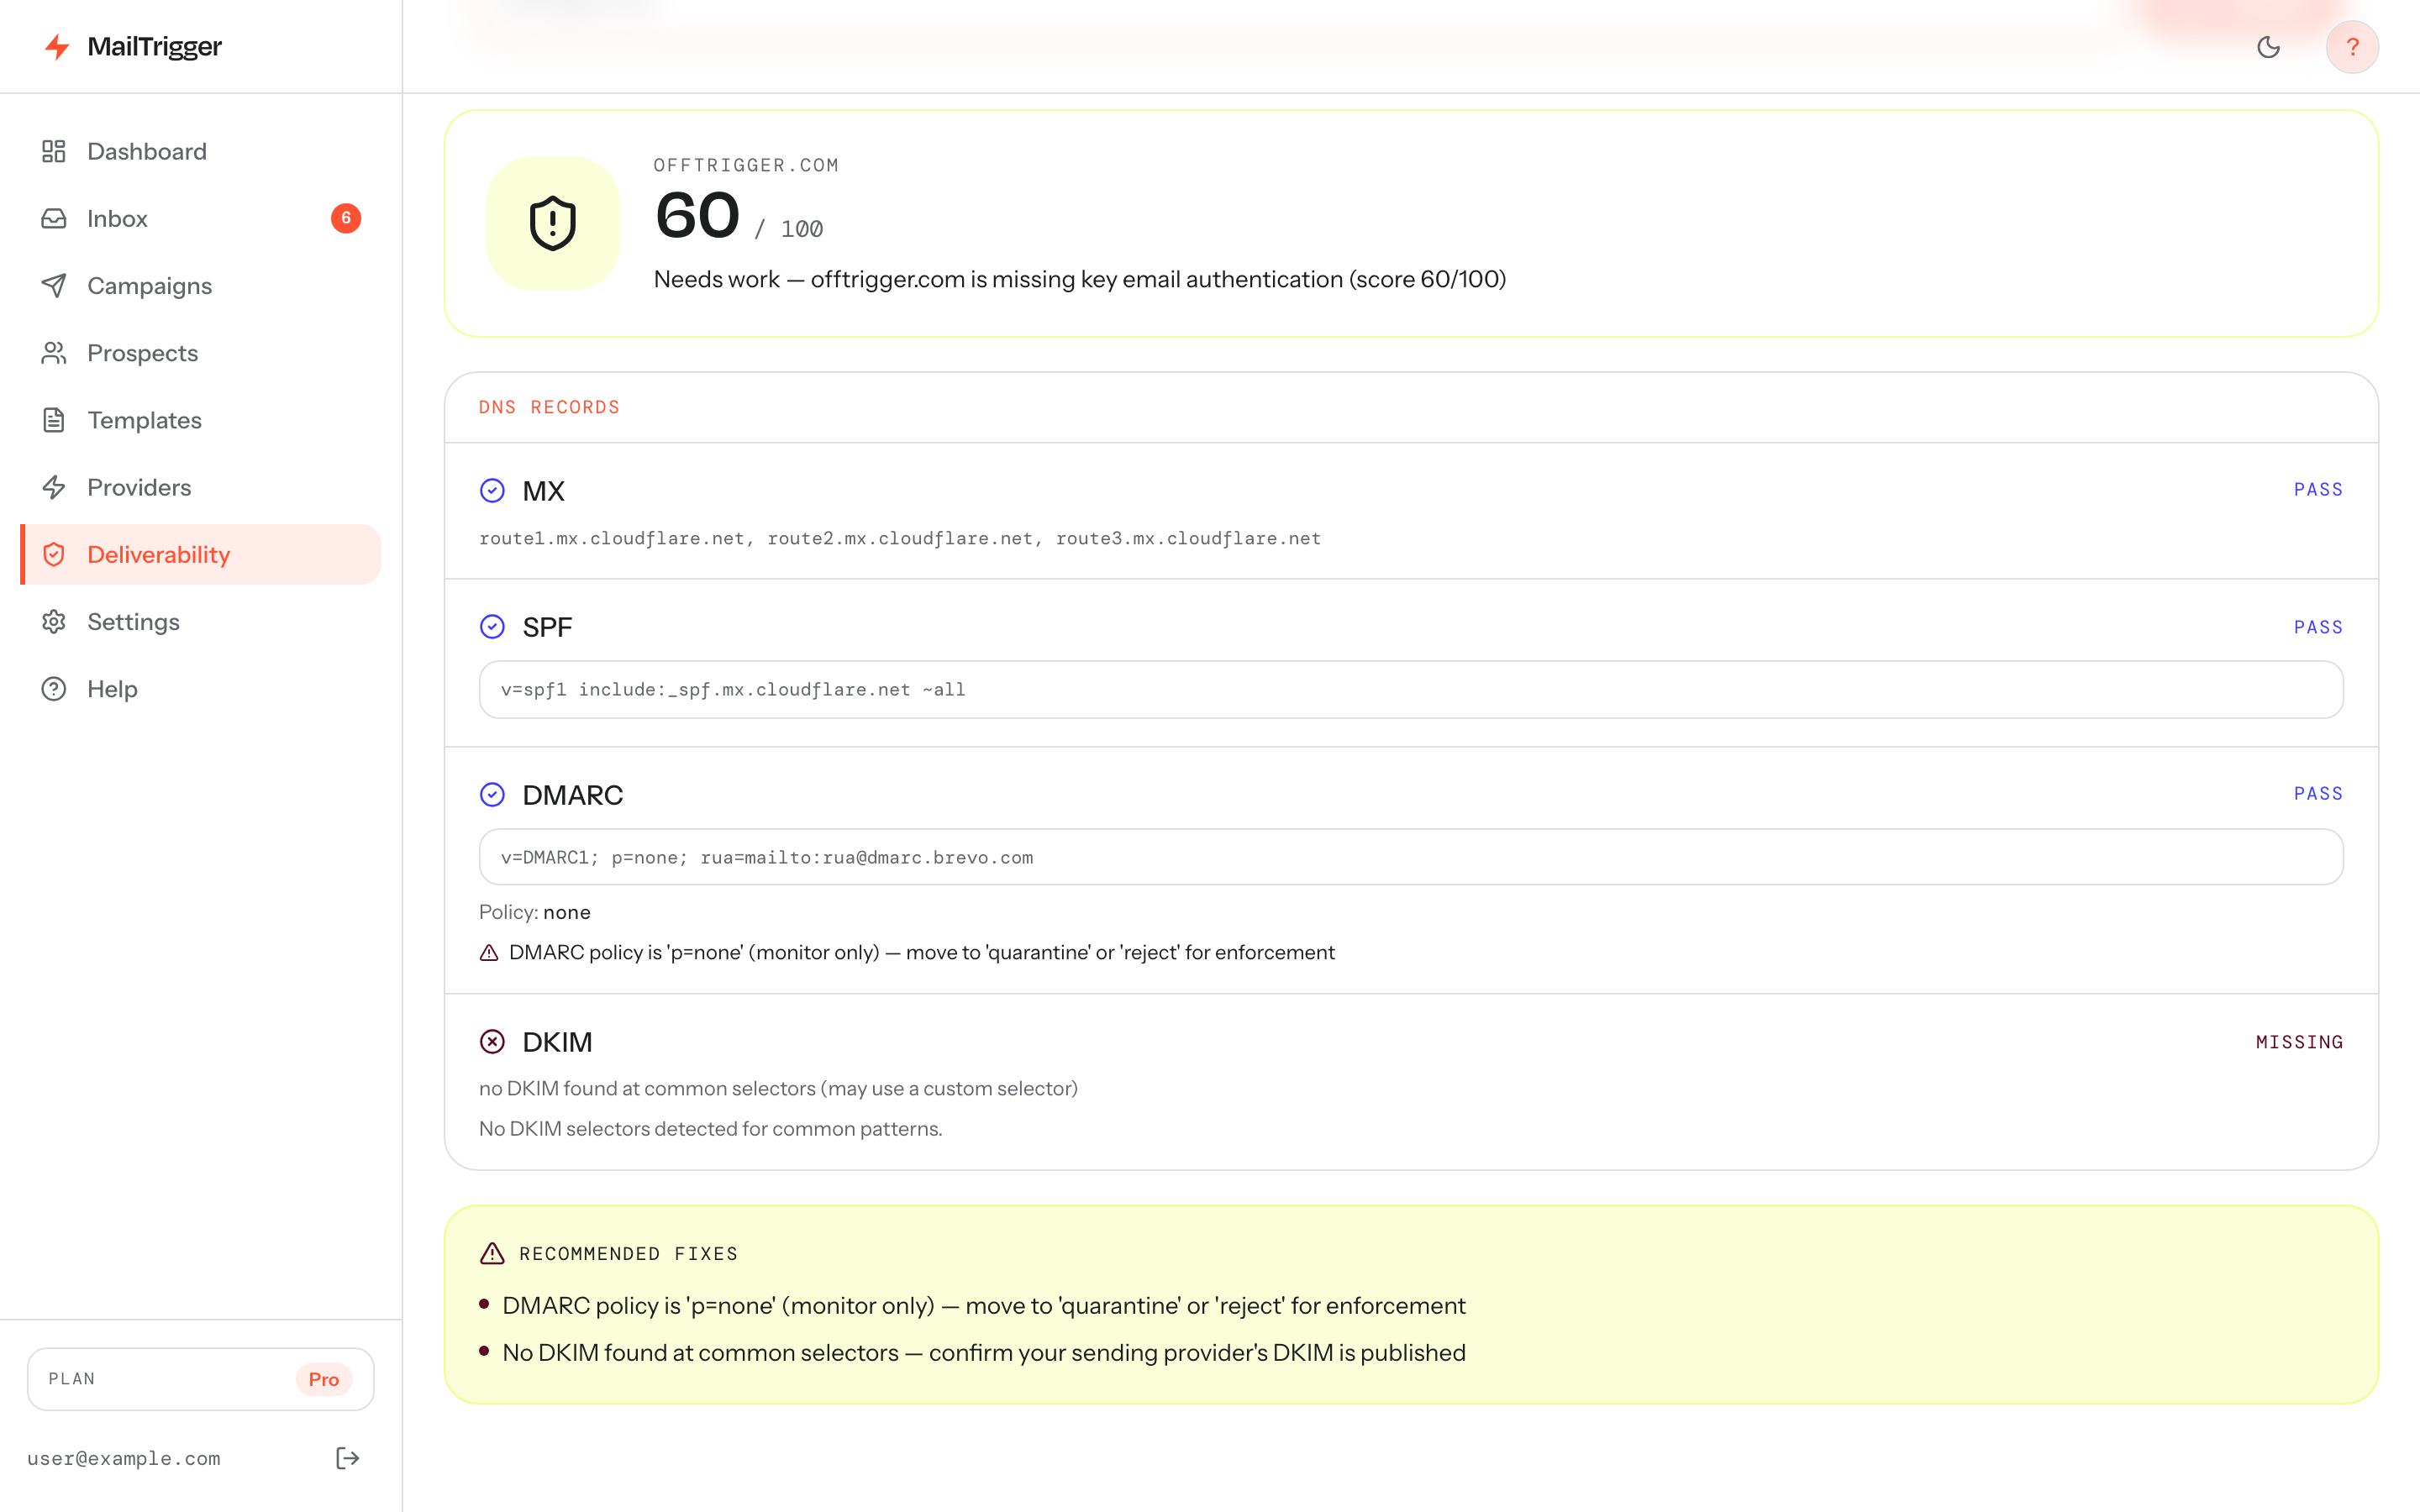
A pre-send authentication check shows each record's status — SPF and DMARC passing, DKIM still missing — so you can fix the gaps before your first cold email goes out.
Don't trust setup blindly — verify:
- Send a test to a Gmail address, open it, and use "Show original." You want
SPF: PASS,DKIM: PASS, andDMARC: PASS. - Use a checker like MXToolbox or your DNS provider's tools to confirm each record resolves.
- Watch DMARC reports (the
ruamailbox) for the first week or two to catch any legitimate sender that isn't aligned yet.
Once all three pass and align, you've cleared the single biggest deliverability hurdle. The next levers are warm-up and sending limits — and your sending infrastructure choice, which decides whose reputation rides on these records. With MailTrigger's bring-your-own-key model, you authenticate your own domain and send under your own reputation.
FAQ
Do I really need DMARC for cold email?
Yes. Since the 2024 bulk-sender rules, Gmail and Yahoo require a published DMARC record alongside SPF and DKIM, and Microsoft now rejects non-compliant bulk mail (Security Boulevard). Without DMARC, expect your cold email to land in spam or be rejected.
Which DMARC policy should I use — none, quarantine, or reject?
Start with p=none. It satisfies the Gmail/Yahoo requirement while still delivering all your mail and sending you reports (support.google.com). Move to quarantine and eventually reject only after the reports confirm your legitimate mail consistently passes and aligns.
Can I send cold email without DKIM?
You shouldn't. While DMARC technically passes if either SPF or DKIM aligns, Gmail and Yahoo expect all three records to be set up for bulk senders. DKIM is also the more robust signal because it survives forwarding, whereas SPF often breaks. Set up DKIM — it's a one-time DNS change.
How do I check that SPF, DKIM, and DMARC are passing?
Send a test email to a Gmail account, open it, click the three-dot menu → "Show original," and look for PASS next to SPF, DKIM, and DMARC. For a deeper view, use a free checker (MXToolbox, dmarcian) or read your DMARC aggregate reports.